2-IN-1 DIY Back-to-School Bohemian Inspired Wall Art
As we enter the scorching days of mid-September, all I can think about is the fact that summer is almost over. As we all say farewell to my most beloved season, we zealously welcome Fall: The crisp cooling winds, football, and back-to-school shopping. We welcome it, we dread it... expenses relating to the school season is a reality we all face as mothers, students and as teachers. Among the increasing cost of school essentials such as technology, paper supplies and books comes the cost of dorm decor. This blog post will prove helpful to #BOHOBABES who are in need of a low-cost DIY project that is both easy and practical. This projected need had me thinking. During one of my end of the summer walks in the backyard I noticed a smorgasbord of broken branches and sticks. As I kicked around a few detached pieces of a rose bush, I had a stunning idea! 2-in-1 DIY BOHO Inspired Wall Art. This DIY BOHO Chic wall art is a minimalistic frame that can be easily converted to a jewelry/ necklace holder. This DIY is the perfect addition to a dorm room or gallery wall in your home. All you need are a few household items. Did I forget to mention, this DIY includes a FREE PRINTABLE? Now, TAKE THAT back-to-school expenses!
Supplies:

- Medium Sized sticks
- Mini Hooks
- Mini Eye hooks
- Acrylic Paint (Assorted Colors)
- Paint Brush
- Painter’s Tape
- Scissors
- Burlap or Jute Twine
- Hole Puncher (Not Pictured)
- Your FREE Wildflower and Pearl Printable
First, prep your stick. Clip off any rough and pointed ends or branch pieces.
Next, add your painter's tape.


Cut small strips of painters tape and tape the pieces around the stick in various places to create a liner pattern.
Paint.


Start painting exposed sections of your stick to create a color pattern. I painted a basic tribal design. Let your inner #bohobabe take control. Be creative! Once you are done painting CAREFULLY remove the painter's tape.
Let your stick design dry.
Allow your painted stick design to dry completely before proceeding to the next step. Drying your painted stick will take an hour or two.
Attach the mini eye hooks.

Once your painted stick design has dried completely, carefully screw two mini eye hooks on opposite ends of the stick. When screwing in the mini eye hooks take your time and use firm pressure.
Attach your twine of choice by threading it through the mini eye hooks and securing it with a knot. Cut off any excess twine for a clean look. The twine should be twice the length of your stick. Instead of the blue twine, (pictured) I changed my mind (as I often do) and went with the jute.
For the frame DIY:

Carefully use a hole puncher to punch two equally spaced holes on the top portion of your free W+P printable.
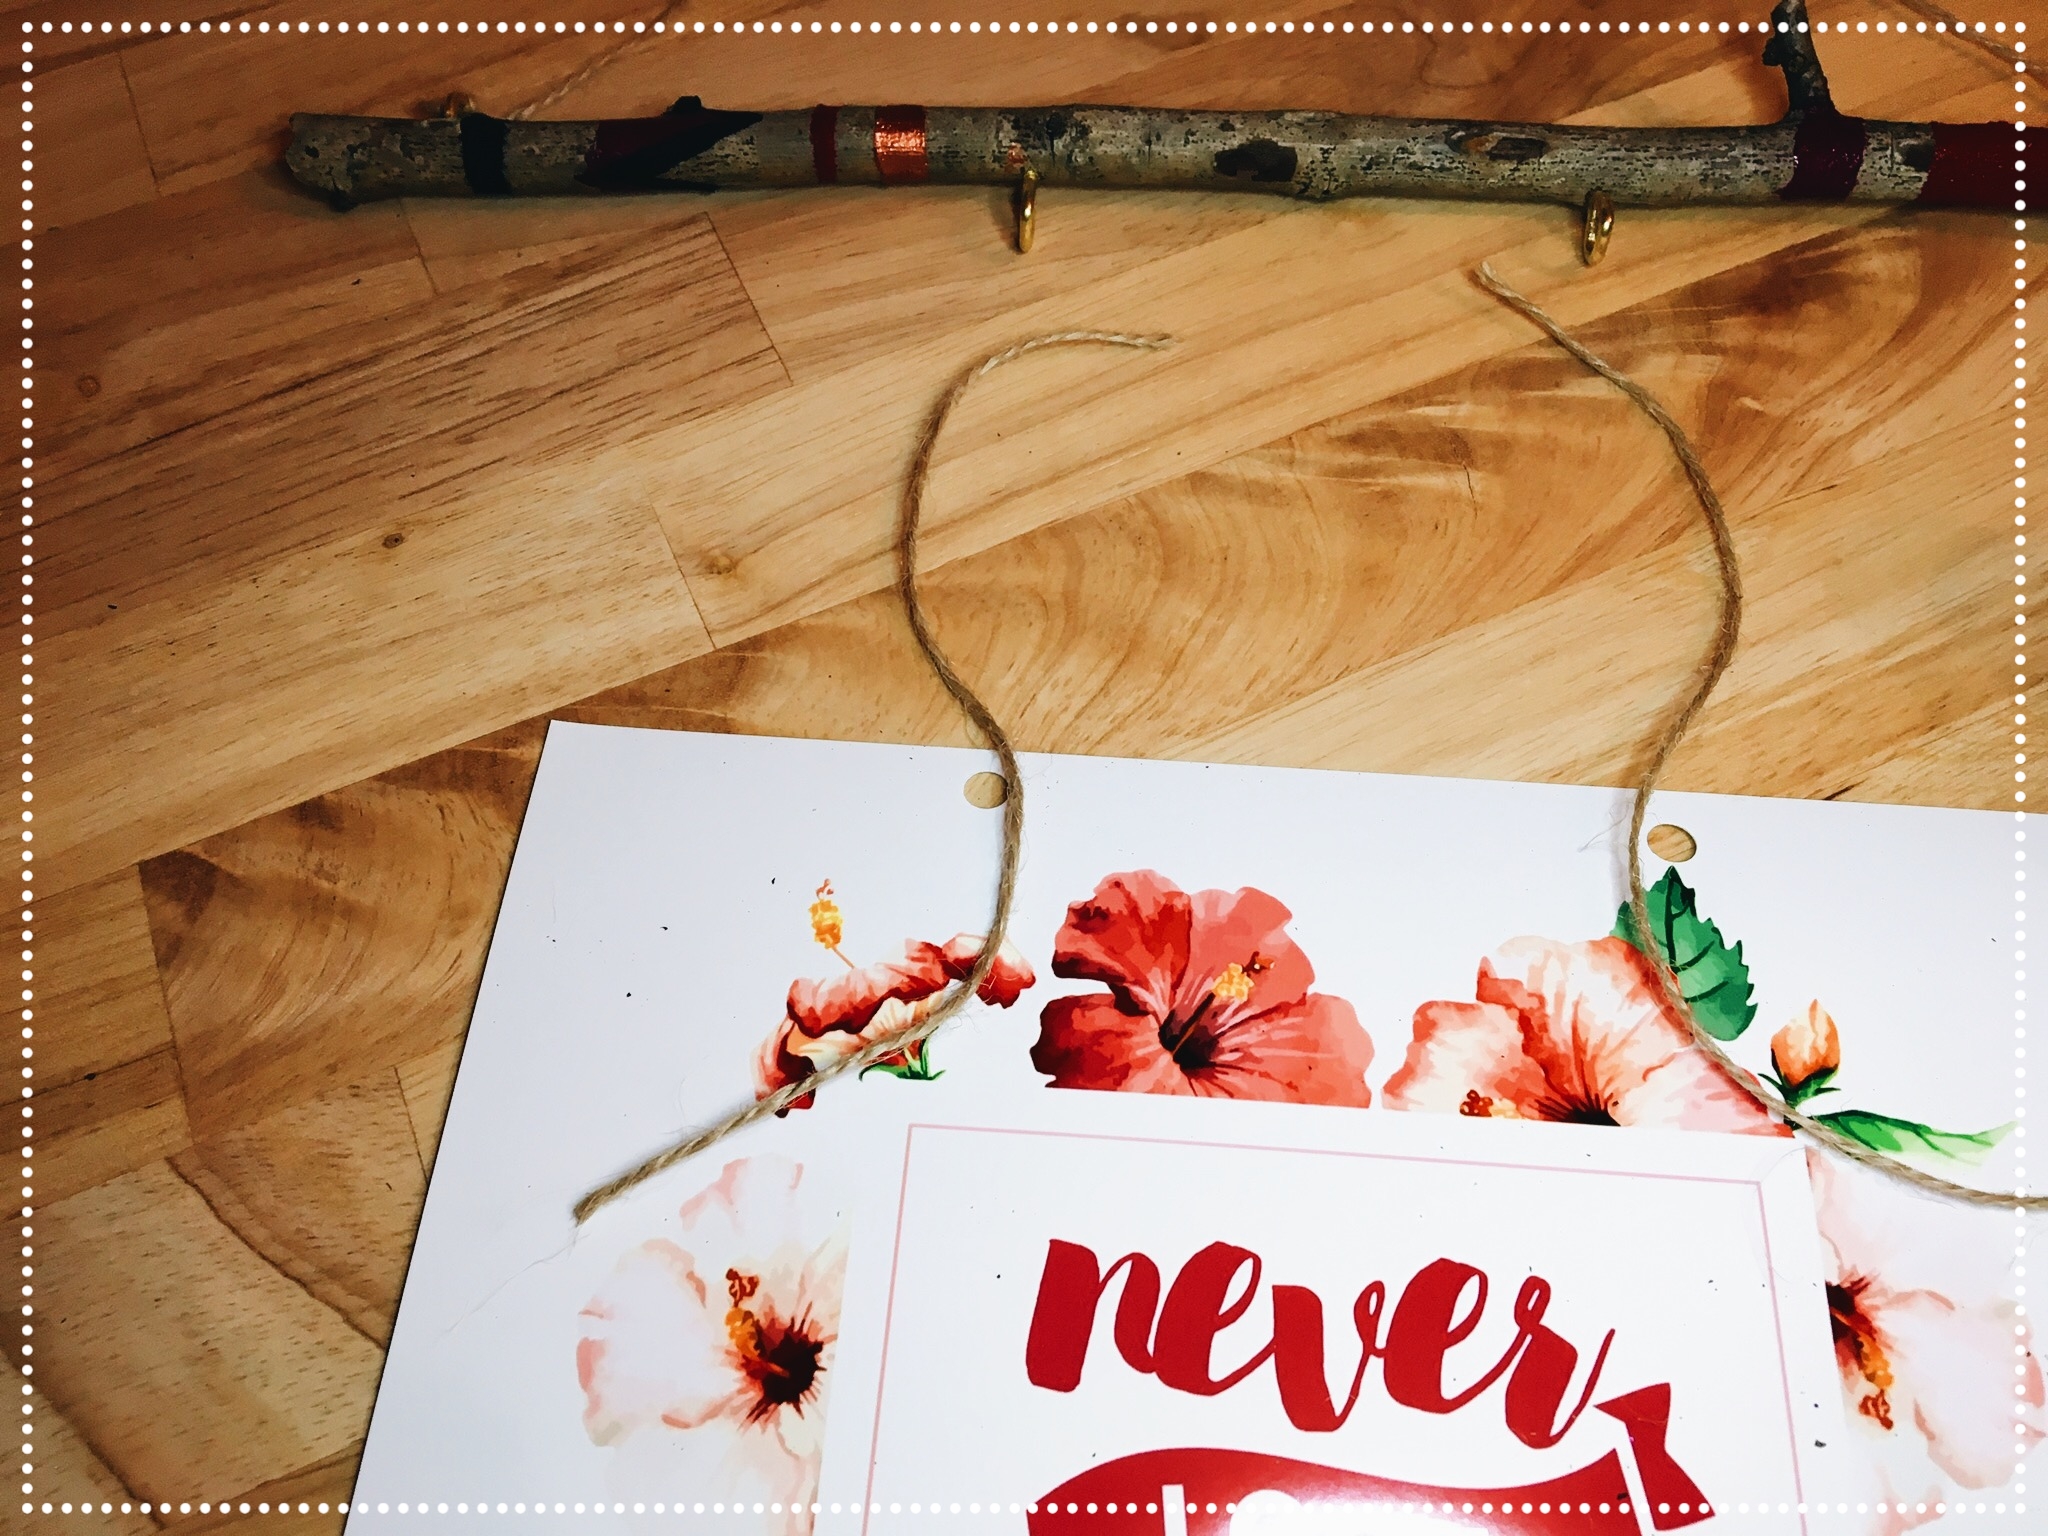
Carefully attach two mini hooks (equally) a few inches apart on the bottom side if your painted stick. When screwing in the mini hooks take your time and use firm pressure.

Attach your twine of choice by threading it through the mini hooks and securing it with a knot. Cut off any excess twine for a clean look. Tie a similar knot where you punched the holes on your free W+P printable.


Hang the wall art on your dorm wall. It will also make a great addition to a gallery wall.
For the necklace/ jewelry holder DIY:

Attach the mini hooks. Screw four mini hook screws onto the bottom portion of the stick. Depending on the length of the stick, equally screw in hooks one inch apart until you use all four hooks. When screwing in the mini hooks take your time and use firm pressure.

Securely hang your new necklace/ jewelry holder in a bathroom or near a vanity for easy access.
Have A Great School Year!
I hope this helps.
-F